Snowflake
This guide explains how to connect a Snowflake SQL database to GESCON. When finished, the organization's agents can be configured with the tables exposed by this source.
Opening the Data section
- Sign in to GESCON with an administrator account.
- Open the profile menu, select Settings > Data, and open SQL. This page shows connected databases and the option to add one.
Adding a Snowflake SQL database
- Select Add source in the top-right corner and choose Database from the menu.
- The SQL database form opens. Under Configuration:
- Under Database type, select Snowflake from the available engines.
- Enter a descriptive Name, such as "Company Snowflake."
- Optionally add a Description explaining what information the database contains.
- Select Next.
Use a name and description that make the source easy to identify when several data connections exist.
Setting connection parameters
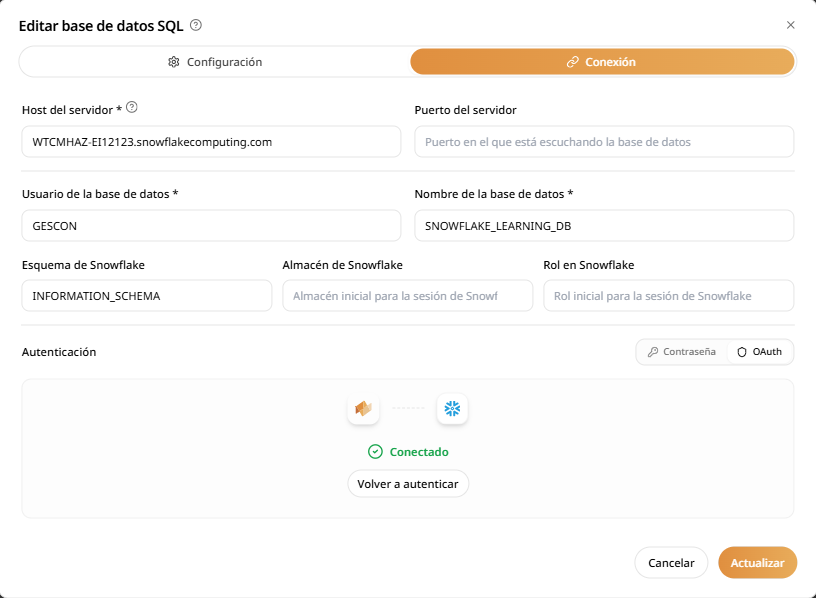
- On the Connection tab, complete the Snowflake connection fields:
-
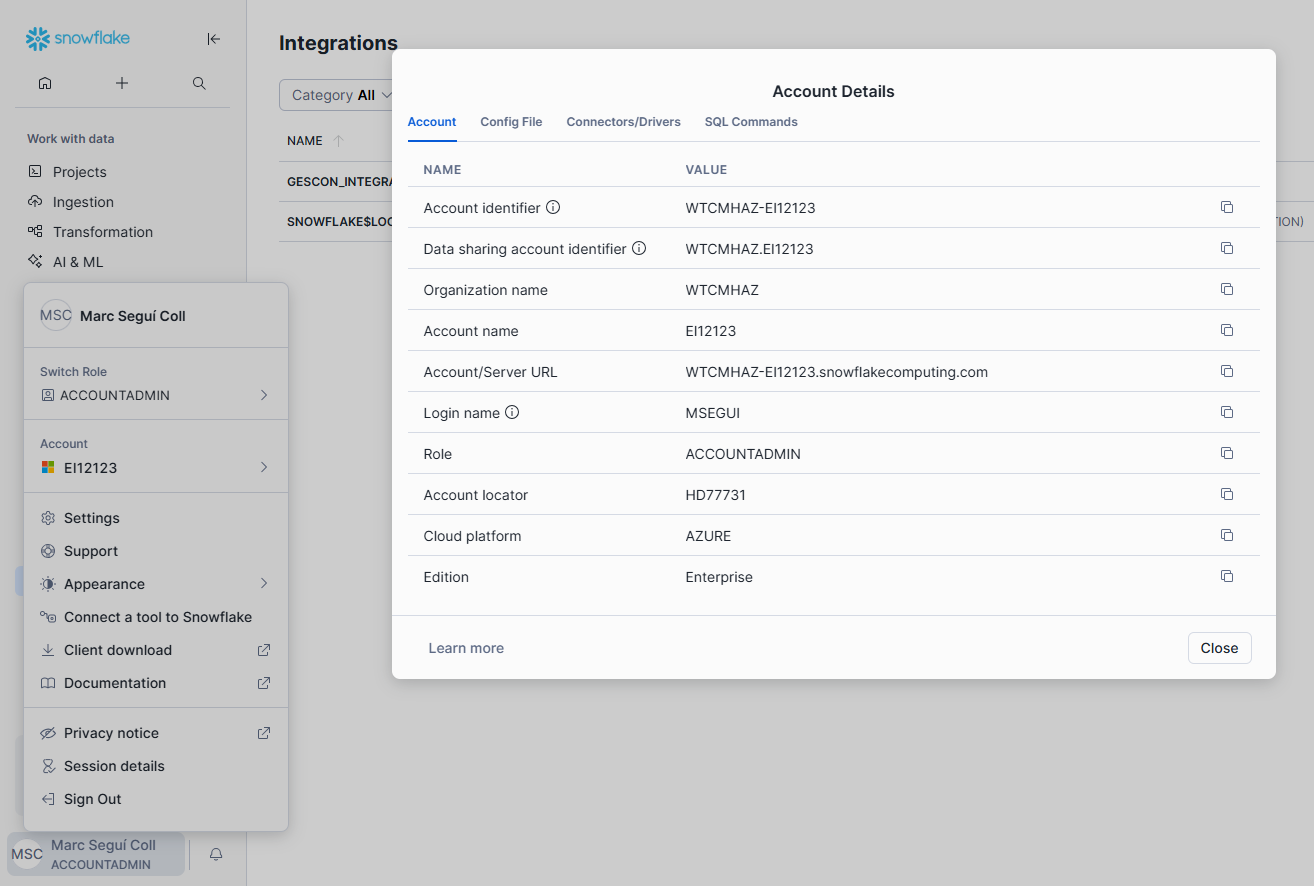
Server host: the Account/Server URL shown in the Snowflake account details.
-
Optional server port: use this if the service is exposed on a port other than 443.
-
Database user: the user for this connection. Create a dedicated GESCON user for queries and give it only the minimum roles required to access the intended data.
-
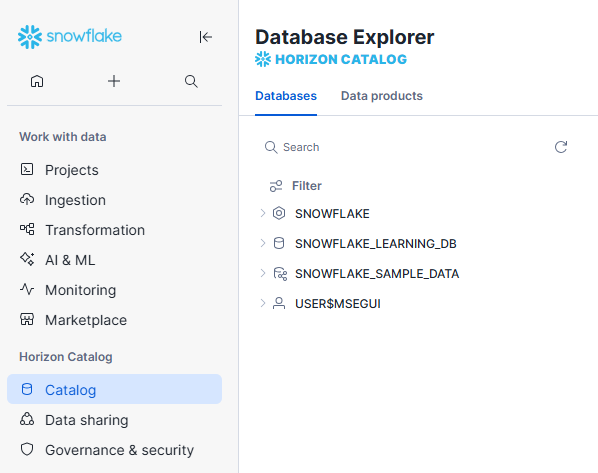
Database name: the database containing the tables to query.
-
Schema, Warehouse, and Role: optional parameters for further limiting the Snowflake connection.
-
- Choose password or OAuth authentication:
- The password must belong to the user entered above.
- For OAuth, follow OAuth authorization.
- Select Create to test and register the connection in GESCON.
OAuth authorization
To connect through OAuth, first create an integration client in Snowflake. A user with the required permissions can create it with a command like this:
CREATE SECURITY INTEGRATION gescon_integration
   TYPE='OAUTH'
   OAUTH_CLIENT= 'CUSTOM'
   OAUTH_REDIRECT_URI='https://gescon.nurialabs.com/oauth/connections/callback'
   OAUTH_CLIENT_TYPE='CONFIDENTIAL'
   ENABLED=true;
The OAUTH_REDIRECT_URI must be https://gescon.nurialabs.com/oauth/connections/callback. You may replace gescon_integration with another name.
After creating the integration, inspect it by name:
DESC SECURITY INTEGRATION gescon_integration;
Copy the returned OAuth values into the GESCON form.
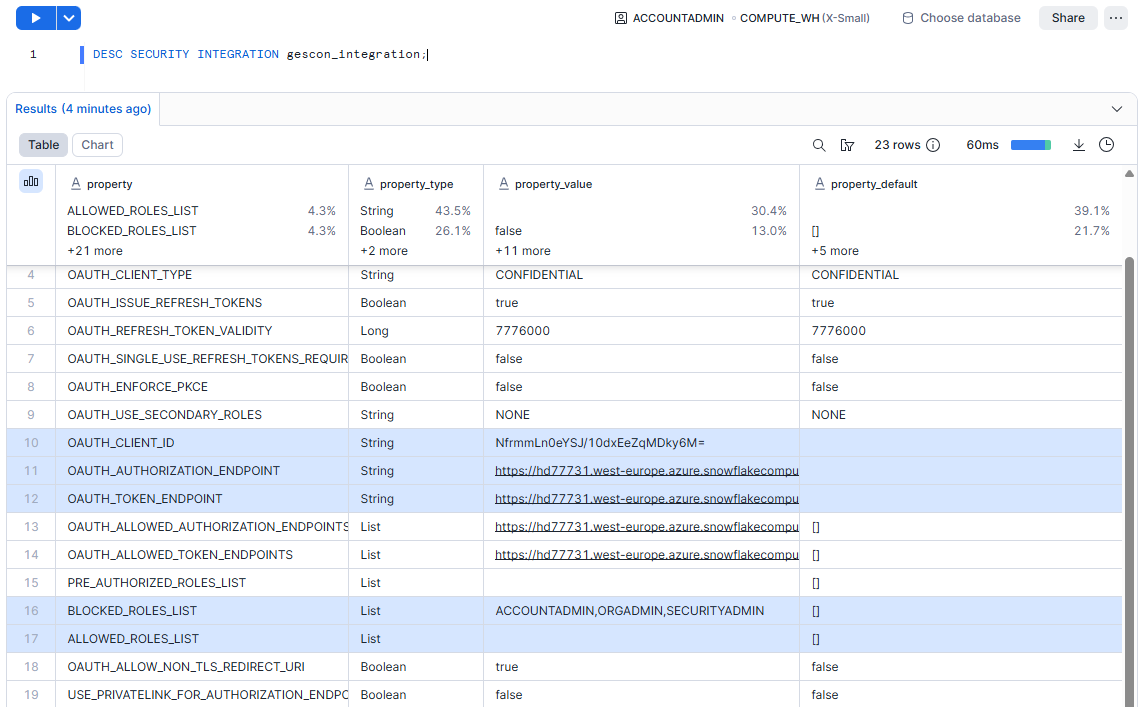
Make sure the configured role is not included in BLOCKED_ROLES_LIST, or the server will reject authentication.
Enter the OAUTH_CLIENT_ID and the authorization and token endpoint values in the connection's OAuth form.
To obtain the client secret, run another query using the uppercase integration name:
SELECT SYSTEM$SHOW_OAUTH_CLIENT_SECRETS('GESCON_INTEGRATION');
The query returns JSON containing OAUTH_CLIENT_SECRET and OAUTH_CLIENT_ID. Confirm that the client ID matches the previous value, then copy OAUTH_CLIENT_SECRET into the GESCON form.
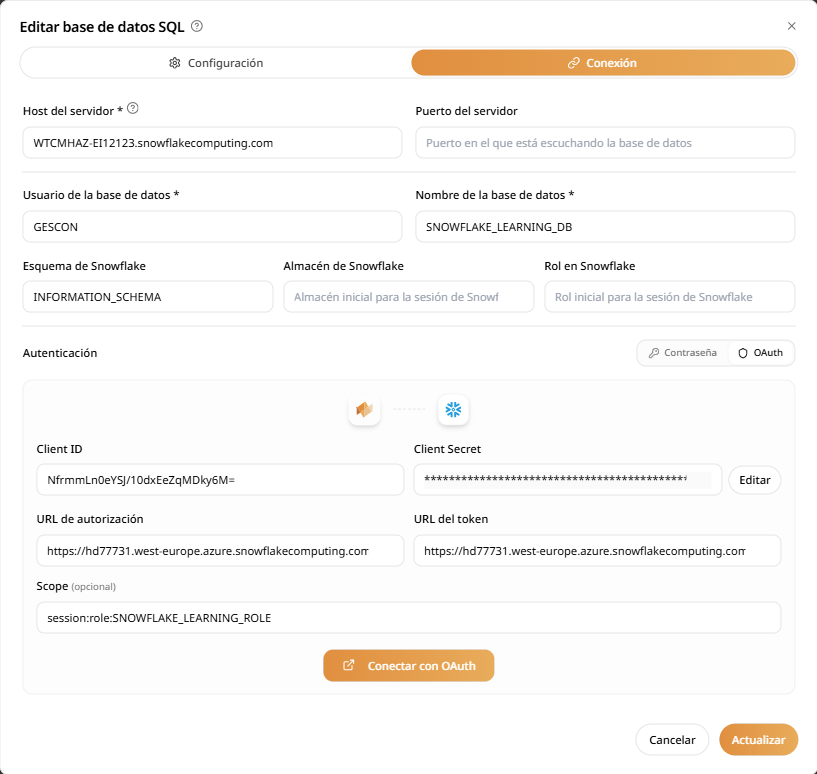
After saving the connection, GESCON does not display the Client secret. When editing the connection, enter the value again; previously entered secrets are not shown.
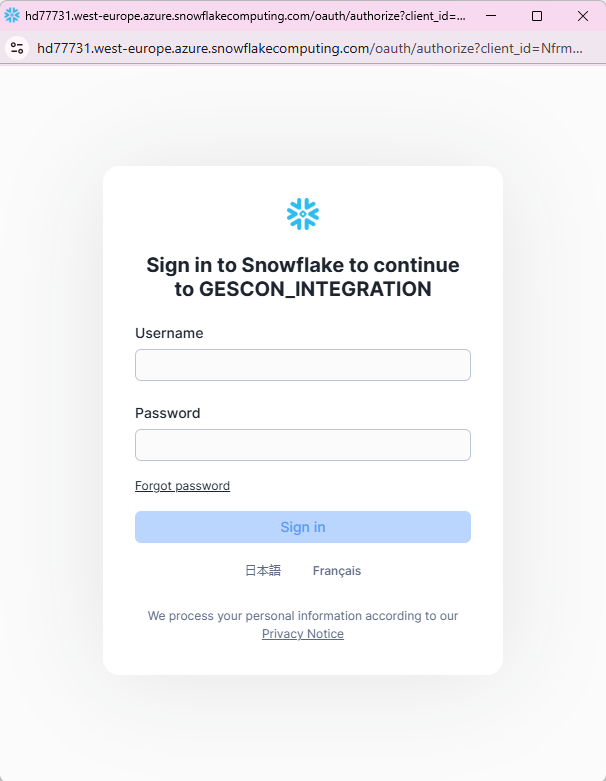
Select Connect with OAuth to begin authorization. A popup opens the Snowflake sign-in page for the configured user. GESCON then receives an access token and can run queries on that user's behalf without storing their password.
Troubleshooting
- Isolate parameters: start with the minimum configuration and add parameters one at a time to identify the cause.
- The popup does not appear: allow popups for GESCON in the browser.
Next steps
After connecting Snowflake, you can:
- Configure another Snowflake connection for a different database.
- Add other data sources, such as SharePoint, other database engines, or APIs, to expand the knowledge base.
- Configure agents with this SQL connection for interactive data queries.